Customers
Note:
The Customers section of the Enterprise Portal is only available to Account Users.
Introduction
Customer Module of the Enterprise Portal allows Account Administrators to create and manage their Customers.
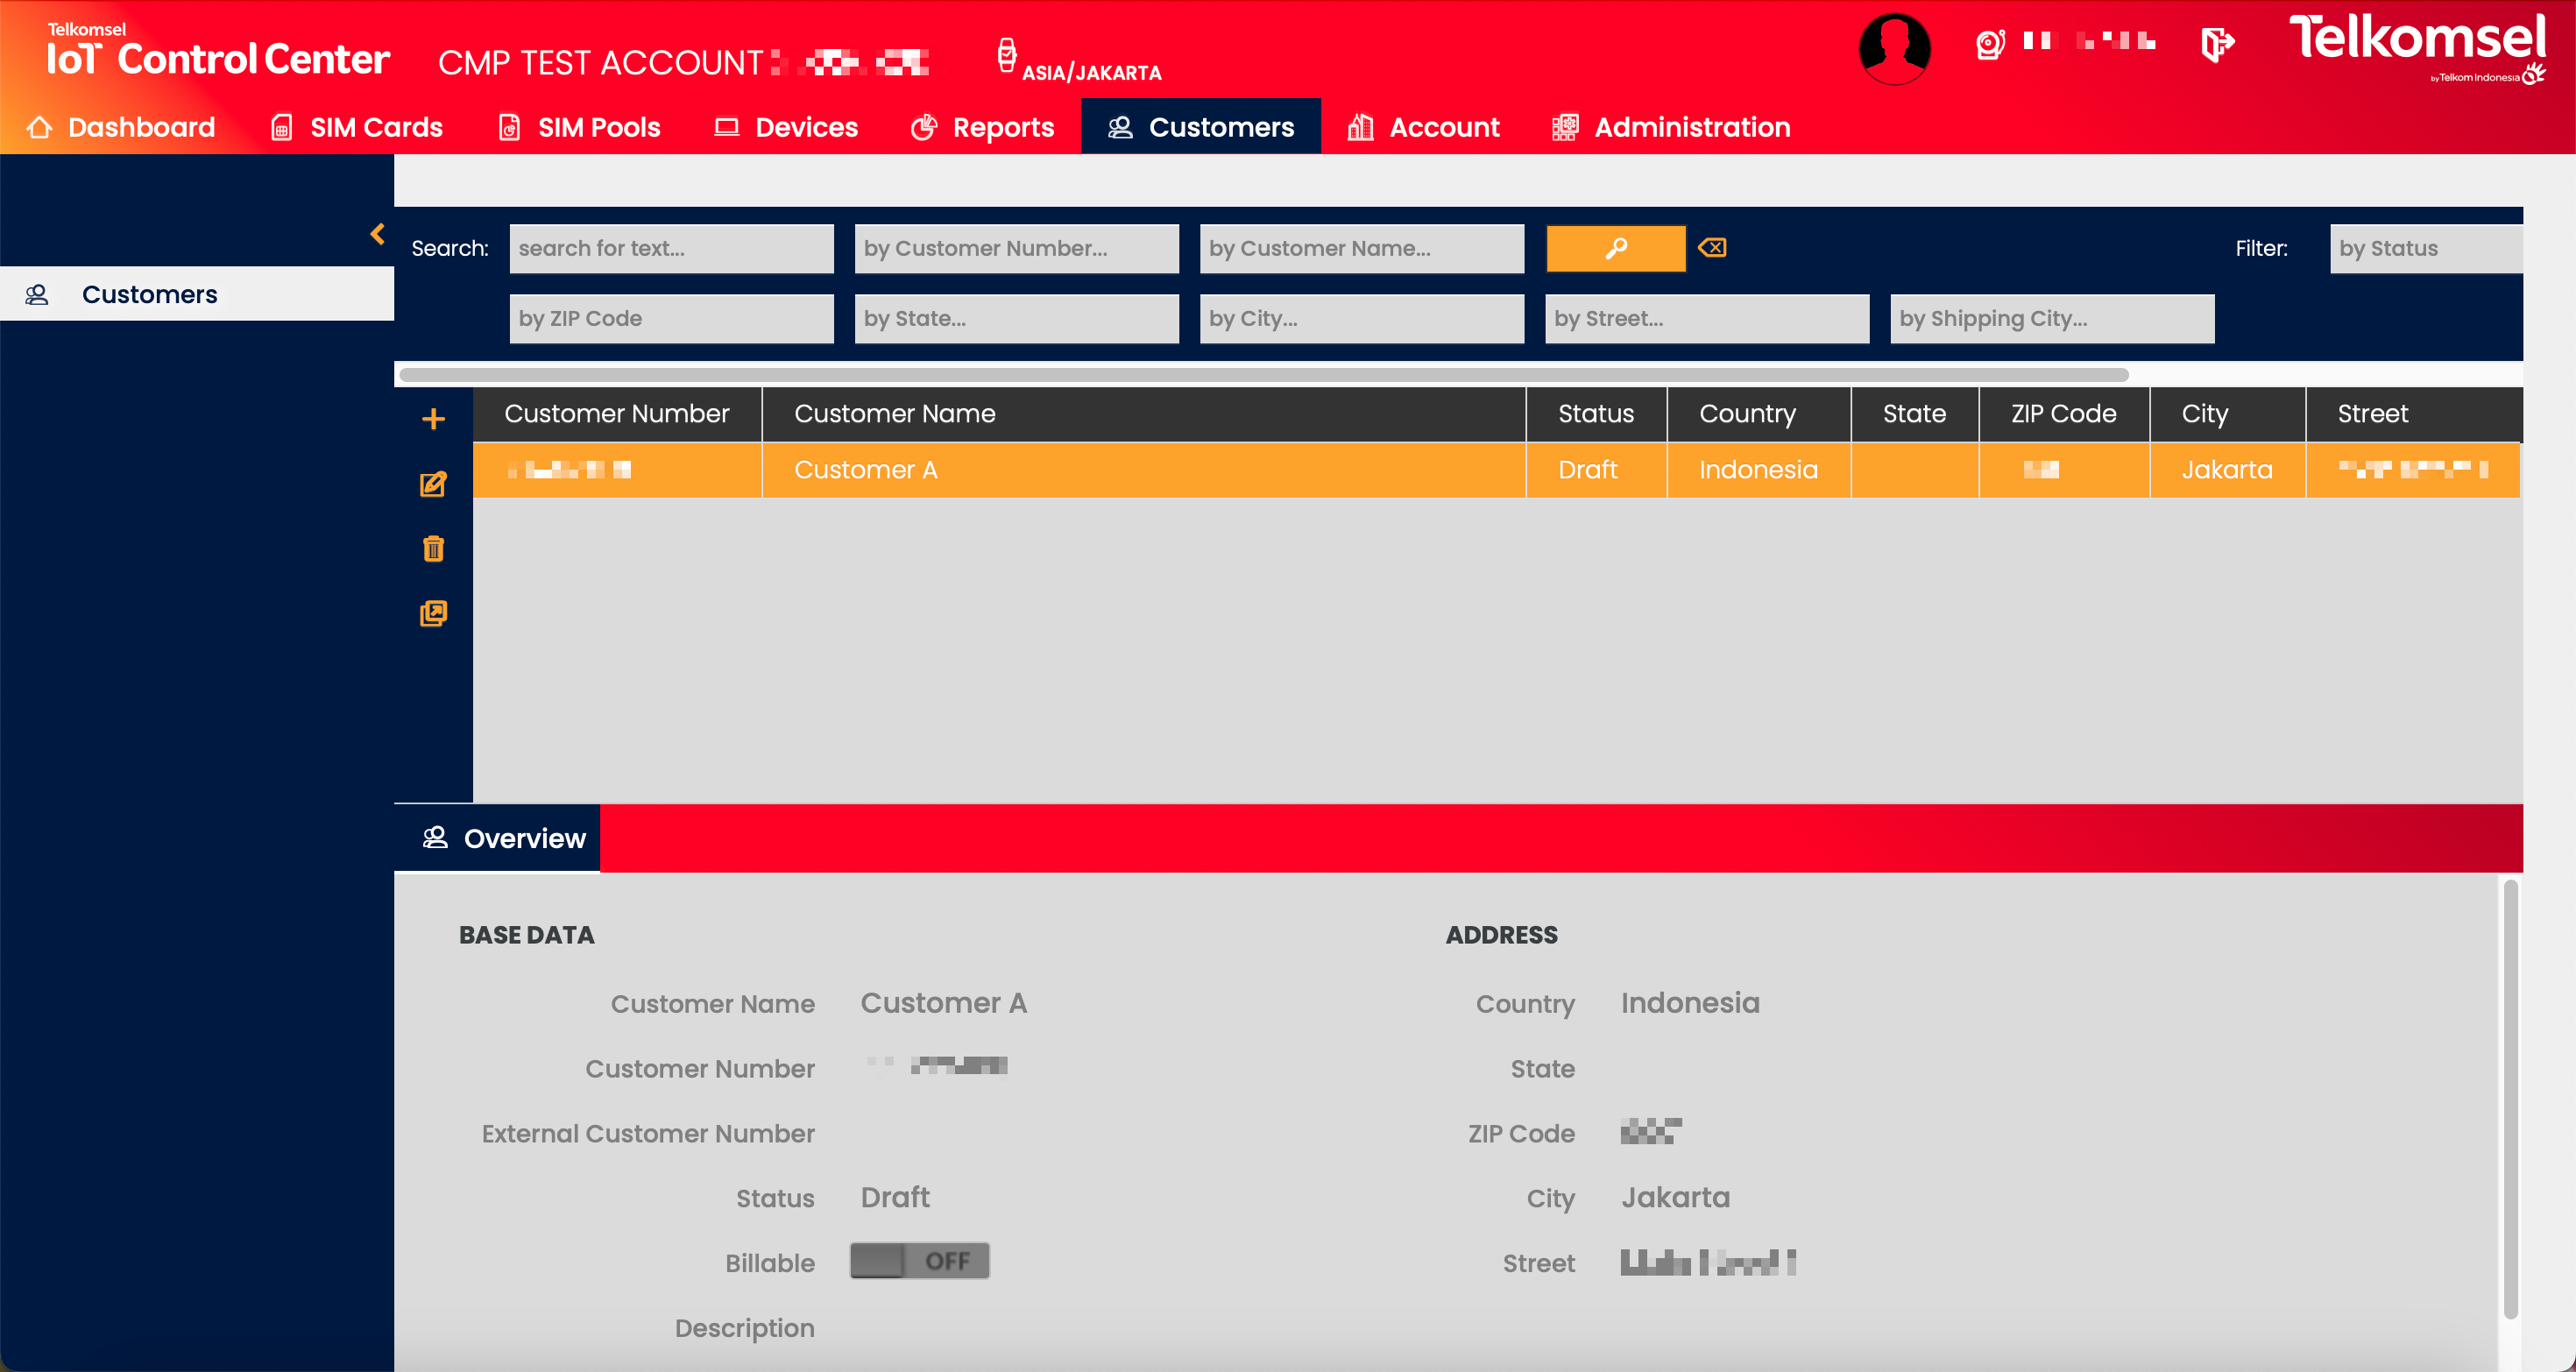
Search for a Customer
The search option of the Customers module allows Users to retrieve a list of Customers by entering text into the Search field. Accounts can be also be searched by
- Customer Number,
- Customer Name,
- ZIP Code,
- State,
- City,
- Street, and
- Shipping City.
Search results may be filtered with the criteria given in the Search bar.
Filters:
- Status
- Country
The inserted search and filter criteria can be removed by clicking on the Clear search ![]() icon.
icon.
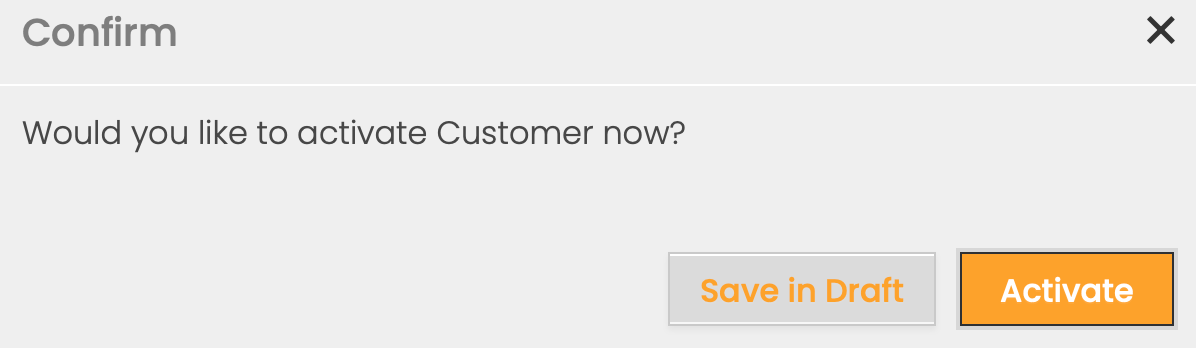
Add a Customer
To add a Customer:
- Click on the Add
 icon.
icon. - Define the information fields for the new Account. For a detailed description of the fields see the following sections.
Fields marked by a red asterisk are mandatory. - Click Create to save the Customer.
- Select whether the Customer should be Activated immediately or Saved in Draft.
Main
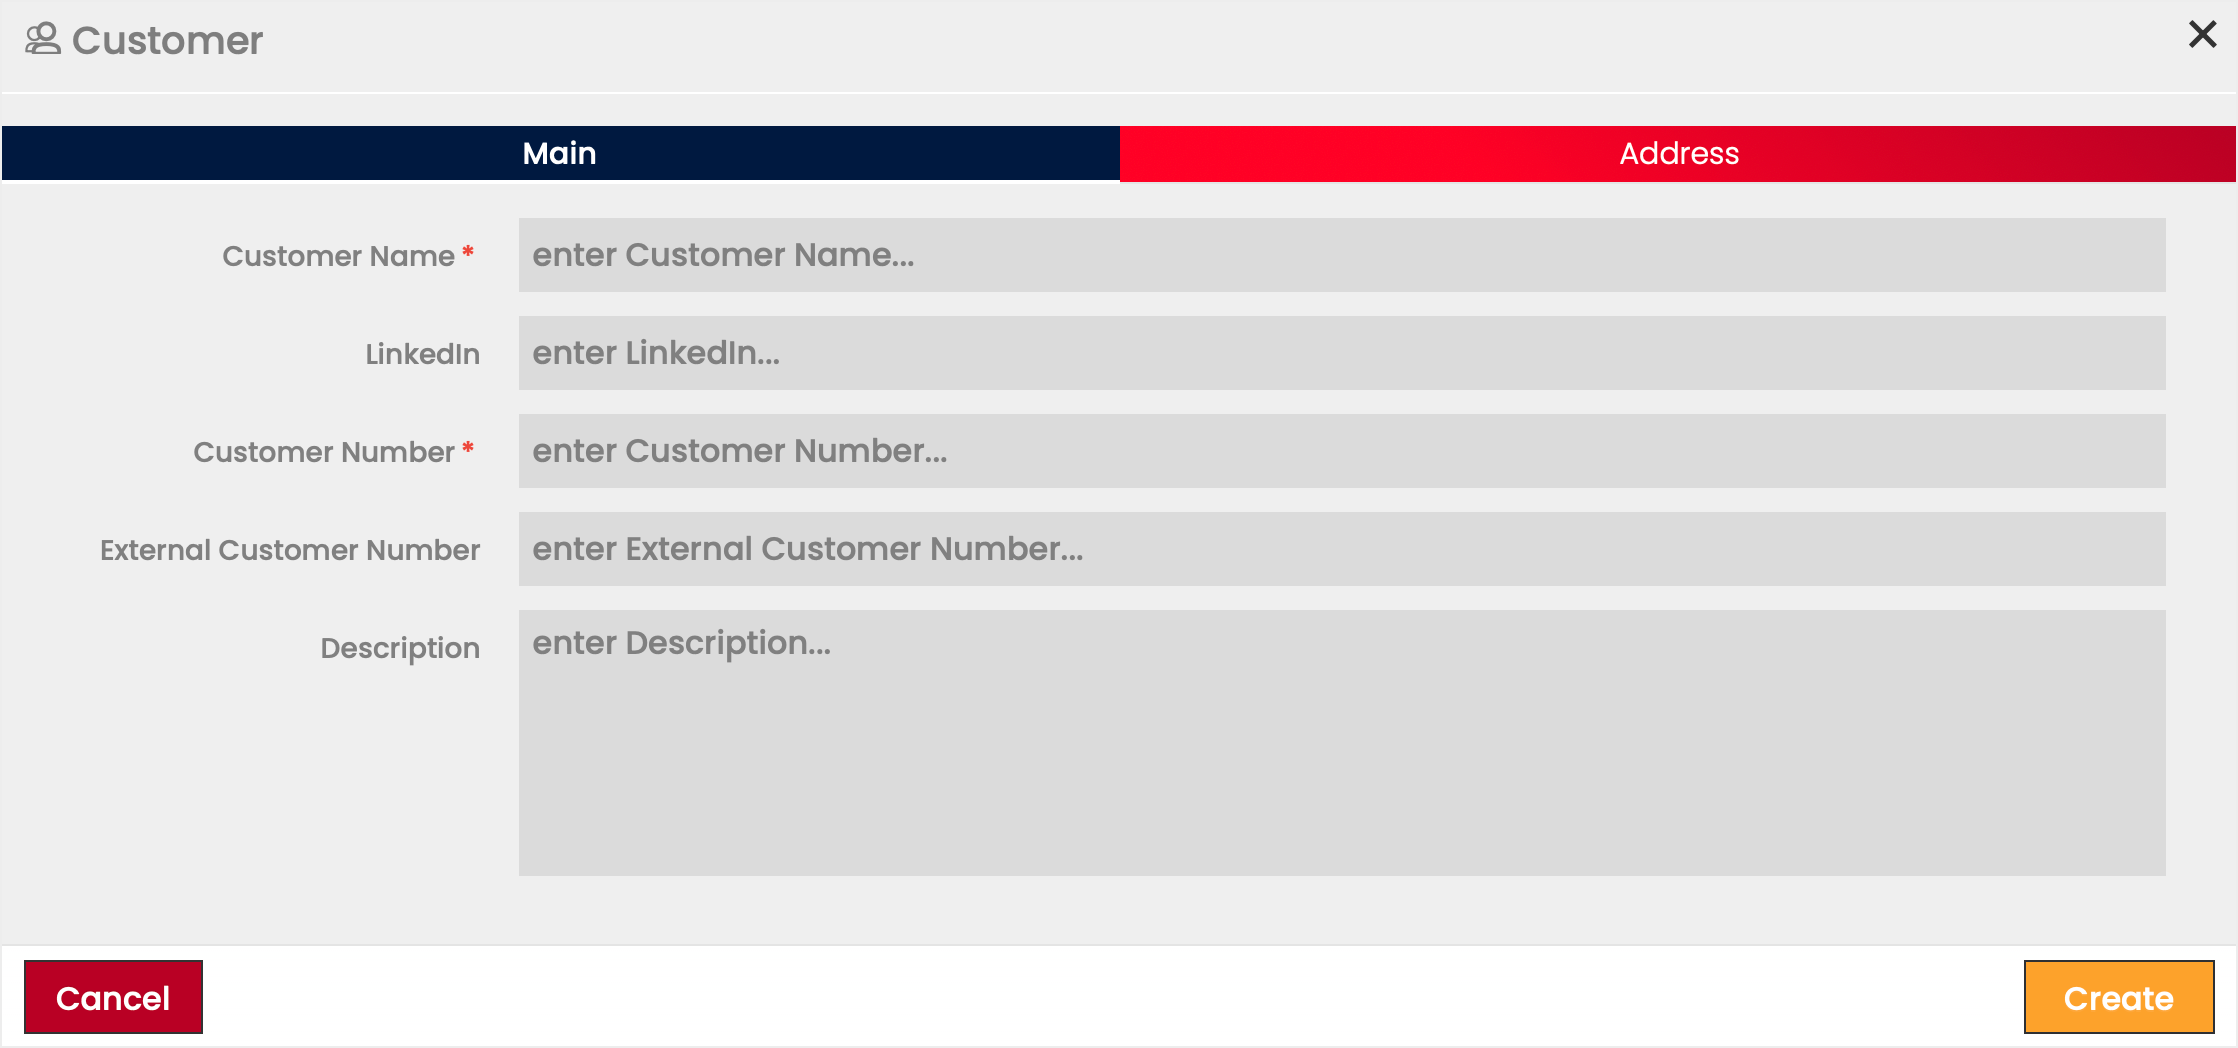
Field | Description | Field | Description |
|---|---|---|---|
Customer Name | Name to identify the Customer. | External Customer Number | For use in reference to the Customer outside of the CMP context. Any combination of alpha and numerical characters is accepted. |
LinkedIn profile of the Customer. | Description | Additional comments/remarks regarding the Customer. | |
Customer Number | Numeric identifier of the Customer within the CMP. Auto-assigned after creation. |
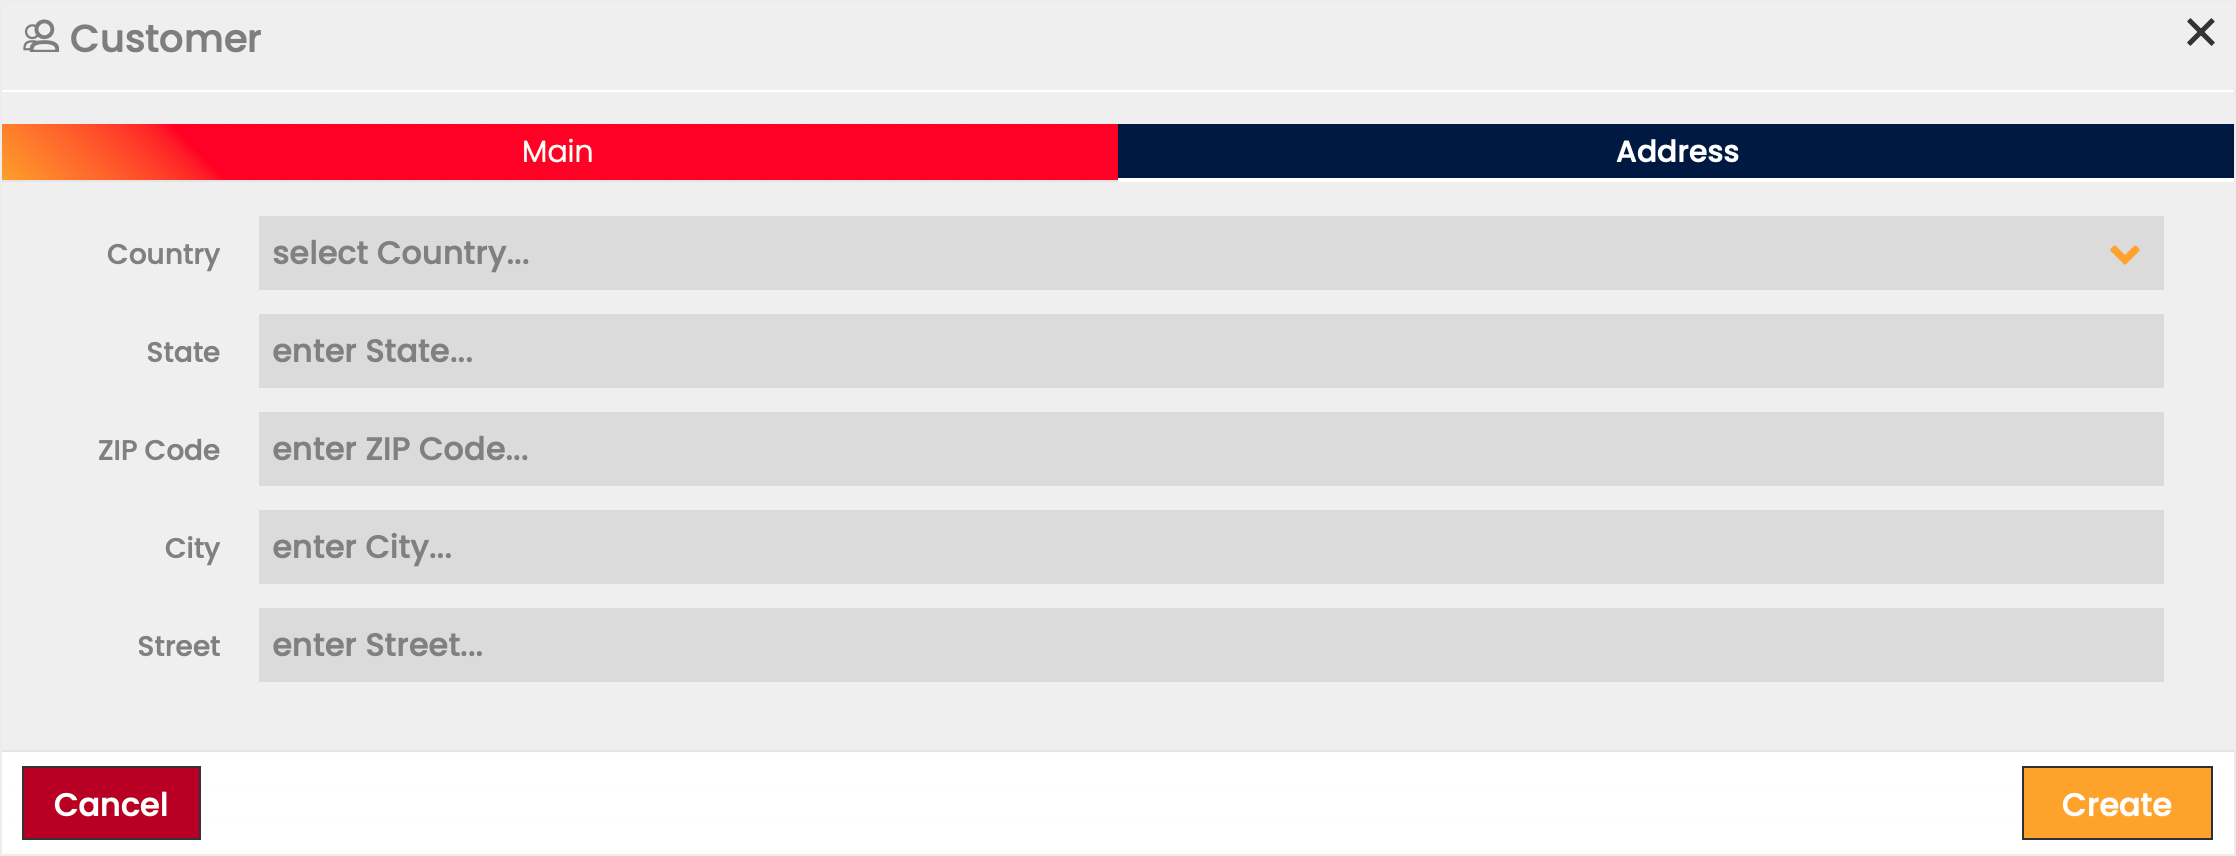
Address
The Address tab allows you to define the details of the Customer's Address.
The following information can be defined for the Address:
- Country
- State
- ZIP Code
- City
- Street
Edit or Delete Customers
The settings of any Customer can be edited while in the Draft status. After initial activation, a Customer can never revert to Draft Status.
- Click the Edit
 icon to modify the settings seen in the Customer creation. Once the Customer is activated, the data displayed in the edit dialog becomes read-only.
 - Click the Delete
 icon to delete a Customer.
Customer Lifecycle States
Use the Change Status ![]() button to transition a Customer between the various statuses of the lifecycle.
button to transition a Customer between the various statuses of the lifecycle.